Monday, September 4, 2017

LDRS - Watercolor Painting Adorable Polkadoodle Image from LDRS plus New DT Announcement


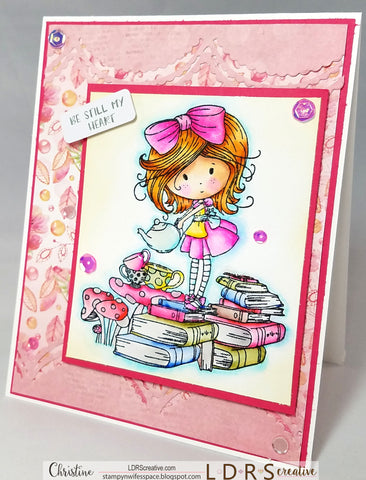
Hi everyone!  I'm here with you today to share a super cheery, bright, and fun card using the delightful and oh so adorable Time for Tea image. As detailed as this image is, it is super simple to stamp (it truly stamps like butter, there's no need for a stamp positioning tool here, it stamps perfectly the first time) and it is super simple to color. Here, I water colored the image and it was so much fun to do! This sweet Time for Tea image combines two of my loves: Tea (obviously :) ) and reading. This image was absolutely perfect for me and I knew this had to be my first image I worked with as a new member of the LDRS Design Team :)
To create this card, I used the adorable Time for Tea Stamp Set and then I water colored the image with my Zig Markers and a water brush. I used the Soft Blush Paper Pad to create the backdrop to the image. I also used the gorgeous Scalloped Swag Border Die to create elegant panels at the top and bottom of my card. For the sentiment, I used the super versatile Splendid Azure - Quick Words Stickers. I chose the "Be Still My Heart" sentiment because I'm sending this card to a fellow book lover and we both have books on our hearts :)
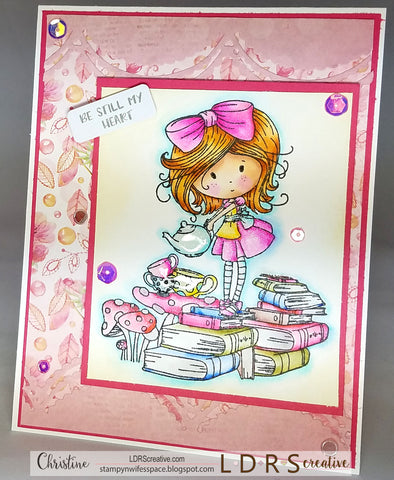
In this photo, the lighting is a bit off, but I wanted to share because this was the best way I found that I was able to show in the photo all the glossy accents and glitter accents I added to the image. To do this, I first added my Wink of Stella Glitter Pen to various elements of the image such as the bow in her hair, her dress, the tea pot, and the cups. I then went over the cups and tea pot with Glossy Accents to create a fun shiny look. It's really fun and sparkly in real life.
I'm so honored to be a DT Member for LDRS Creative. This is a company I have admired and followed for forever and it's such an honor to work for them now. I hope you enjoyed my card today.  I have also created a video tutorial showing how I created this card.  You can view the video here:


 Don't forget to check out the Clearance Section to find some amazing deals.
I really hope you enjoyed my card for today. It is super possible to get really gorgeous coloring results by water coloring your image and I hope you'll give it a try.
Thank you for joining us here at the LDRS Inspiration Blog. Remember we are always here to inspire you. There are some great deals in the CLEARANCE SECTION of our store available NOW and there is a DISCOUNT CODE available on the Spotlight product from the monthly NEWSLETTER so get signed up! Love video tutorials, our DT on the YOU TUBE channel will show you how to use the products. Visit us at any of our other Social Media locations and never miss out on inspiration with these great products!
Huge Hugs,
Christine

Thursday, August 31, 2017

Video Tutorial: Hero Arts My Monthly Hero Kit - Several Card Examples and One Card from Start to Finish

Hi everyone!  I hope you are all having a wonderful week.  I finally had some time to sit down with the amazing August, 2017 My Monthly Hero Kit from Hero Arts.  I have several card samples to share with you today and in the video, I also create one card for you from start to finish.  Here's the video:


And here's the card I made for the video:


And here are two more cards made with the same technique as the card created in the video:


For all three of these cards, I used Distress Oxide Inks (Salty Ocean, Peacock Feathers, Seedless Preserves, and Black Soot), white paint, and the shimmer sprays that came in the kit to create the backgrounds.  I used a combination of several different embossing powders (gold, silver, black, and white).  These cards were so much fun to make. 


For my next three cards, I painted the backgrounds with watercolor paints.  Here's some pictures:


For the card on the left, I used my Gansai Tambi watercolor paints to create the background.  I then stamped the little boy image and embossed him with black embossing powder.  I embossed the stardust swooshes with gold embossing powder.  I stamped the star onto some vellum, embossed it in black, and then cut it out with the coordinating dies.  The sentiment was embossed with white embossing powder.  The card on the right was painted with pearlescent paints to create the background.  I then used various embossing powders to stamp all the fun images.


For my final card, I decided to create a shaker card using the fancy die that came in the kit as well as the sequins that came in the kit.  I stamped the swoosh and the girl and cut them out with the coordinating dies.  I also embossed all the clouds on vellum with white embossing powder and cut them out using the coordinating dies.  The background on this one was also painted using my Gansai Tambi watercolor paints.  The sentiment was embossed with white embossing powder. 


Well that's it from me today.  Thanks so much as always for stopping by.  Have a wonderful day and I'll catch you on the next video :)


Tuesday, August 22, 2017

Video Tutorial: Painting Mermaid Image with Zig Markers and a Water Brush

Hi everyone!  I got some requests to share how I colored the beautiful mermaid image from Honey Bee Stamps which I used in yesterday's card, so I have a new video up showing the coloring technique I used.  I painted the image with my Zig Markers and a water brush.  Here's the video:

To watch on YouTube, click HERE


And here is a picture:


Thanks so much as always for stopping by.  Have a wonderful day! :)


Monday, August 21, 2017

Video Tutorial - Honey Bee Stamps - How to Create a Fun Shaker Card

Hi everyone!  I hope you are having a fabulous week!  I have a new video and card to share with you today showing how I created this fun shaker card.  Here's the video:

To view on YouTube, click HERE)
The adorable images are from Honey Bee Stamps.  I just love their new mermaid release stamp sets.  I watercolored the background with my Gansai Tambi watercolor paints.  I then painted all of the images with my Zig markers and a water brush.  Here are the Zig markers I used: Brown, Light Brown, Marine Green, Violet, Light Violet, Light Gray, Gray, Light Pink, Olive Green, Yellow, Flesh Color, Blush, and Almond Pink. 


To purchase the foam strips from Stampin Up! that I used in the video to make the shaker card, Click Here
I hope you enjoy this video and the card.  Have a wonderful day :)

Thursday, August 17, 2017

Video Tutorial - Waffle Flower - Creating a Fun Shimmery Watercolor Background

Hi everyone!  I hope you are all having a wonderful week!  I have a new video tutorial for you today sharing how I created this fun, shimmery background using my Gansai Tambi watercolor paints and some gold pearlescent paint from Kuretake.  Here's the video:


(to view on YouTube, click HERE)
And here are some pictures of my card:


I used the following Zig markers (along with a water brush) to paint the images: Dark Brown, Brown, Violet, Light Violet, Yellow, Light Brown, Orange, Olive Green, and Light Gray.  I also added some sequins from my stash.  What do you think?

Well, that's it from me today.  Thanks so much as always for stopping by.  Big hugs!


Wednesday, August 16, 2017

New Design Team News!


Hi everyone!  I'm super excited to announce that I have been asked to join the Kennedy Grace Creations Design Team!  You can see the announcement HERE!  I'm so incredibly excited!  Stay tuned, lots of projects to come :) 


Sunday, August 13, 2017

Video Tutorials - Watercolor Pearlescent Background and watercolor painting with Honey Bee Stamps

Hi everyone!  I hope you are having a wonderful day.  I have a two part video for you today, sharing in the first video how I created a fun ocean background scene using Gansai Tambi watercolor paints and silver pearlescent paint from Kuretake, and in the second video, how to watercolor paint the mermaid with Zig Markers and a water brush.  Here's video #1 on the watercolor ocean background:

 (to view on YouTube, click HERE)

And here's video #2 on painting the mermaid:

(to view on YouTube, click HERE).


And here are some pictures:


I used the following Zig markers to color the mermaid: Deep Violet, Light Violet, Marine Green, Dark Brown, Brown, Flesh Color, Blush, and Almond Pink.  I used Olive Green and Light Brown for the turtle.  I used Brown and some Light Blue for the bottle (plus I put some Glossy Accents on the bottle).  I embossed the sentiment with silver embossing powder from Stampin' Up!  I also used lots of Wink of Stella on the  mermaid.  What do you think?


Well, that's it from me today!  Thanks so much as always for stopping by and I'll catch you in the next video!


...and they lived happily ever after.
blog design by vk design company