Hi everyone! I'm here with you today to share a super fun and bright thank you card. It was time to bring out some bright warm colors after doing so many Holiday cards :)
To create this card, I first stamped the adorable I Brought the Cake Stamp onto watercolor paper and water colored the image with m y Zig Markers. I then put my card together using the gorgeous papers from the Soft Blush 6x6 Paper Pad. I then adhered my papers to some brown cardstock and then created a 5 1/2 x 5 1/2 card base out of brown cardstock and adhered everything to the card base. I added some sequins and some flowers for some finishing touches. I added a sentiment from the Splendid Azure Quick Words Sticker Set as well. I also added lots of sparkle with my Wink of Stella Clear Glitter Brush.
Don't forget to check out the Clearance Section to find some amazing deals.
I really hope you enjoyed my card for today. It is so fun to color up these adorable images from Little Darlings.
Thank you for joining us here at the LDRS Inspiration Blog. Remember we are always here to inspire you.
There are some great deals in the CLEARANCE SECTION of our store available NOW and there is a DISCOUNT CODE available on the Spotlight product from the monthly NEWSLETTER so get signed up! Love video tutorials? Our DT on the YOU TUBE channel will show you how to use the products. Visit us at any of our other Social Media locations and never miss out on inspiration with these great products!
Hi everyone! I'm here with you today to share a super fun winter/Christmas card using an adorable LDRS Creative stamp and die set from Little Darlings (and these are on sale right now too!!!).
To create this card, I first created my background using some Salty Ocean and Faded Jeans Distress Oxide Inks. I spritzed the panel with some water to give it that fun distressed look. I then stamped the adorable images from the North Woods Stamp and Die Set from LDRS Creative and then colored the images with my Zig Markers and a water brush. I then cut out the critters and trees using the coordinating dies that come in the set. Next, I used the hillside border die from the Snowy Day Border Die Set (this die can actually be used in so many ways . . . it coordinates with the snowflake border die beautifully, but, as I did here, you can use it by itself to create a fun hillside) to create a snowy hillside and then adhered that to my distress inked panel. I then adhered the trees and critters to the panel with some foam tape and then adhered the entire panel to the front of a standard A2 sized note card. I added a sentiment from the Splendid Azure Quick Words Sticker Set which I thought went well with the little scene I created. My idea is to give this as a thank you note for Christmas gifts received during the holiday season. Finally, for a finishing touch, I added some Nuvo White Blizzard Glitter Drops on the tree and around the panel to look like snow.
Don't forget to check out the Clearance Section to find some amazing deals.
I really hope you enjoyed my card for today. It is so fun to color up these adorable images from Little Darlings.
Thank you for joining us here at the LDRS Inspiration Blog. Remember we are always here to inspire you.
There are some great deals in the CLEARANCE SECTION of our store available NOW and there is a DISCOUNT CODE available on the Spotlight product from the monthly NEWSLETTER so get signed up! Love video tutorials? Our DT on the YOU TUBE channel will show you how to use the products. Visit us at any of our other Social Media locations and never miss out on inspiration with these great products!
Hi everyone! I'm here with you today to share a super fun Christmas card using several new dies from Little Darlings.
To create this card, I used some beautiful design paper from the Winnie Winter Land 6x6 Paper Pack. I then used some white cardstock for the bottom of the card and cut it out with the Snowy Day Border Die Set. I then cut out Christmas Word Die with some light blue cardstock and then four pieces of white cardstock underneath to give it a slight shadow and some dimension. Next, I used the gorgeous Peace Ornament Die Set to cut out the beautiful ornament (I used light blue cardstock and silver glitter paper). I added some blue twine to the hole the die makes in the ornament and tied a bow and then adhered the ornament to the cardstock panel using foam tape. Finally, I adhered the entire cardstock panel to a standard white A2 card base.
Don't forget to check out the Clearance Section to find some amazing deals.
I really hope you enjoyed my card for today. It is super possible to create really gorgeous, elegant holiday card by just using some of these new dies.
Thank you for joining us here at the LDRS Inspiration Blog. Remember we are always here to inspire you.
There are some great deals in the CLEARANCE SECTION of our store available NOW and there is a DISCOUNT CODE available on the Spotlight product from the monthly NEWSLETTER so get signed up! Love video tutorials? Our DT on the YOU TUBE channel will show you how to use the products. Visit us at any of our other Social Media locations and never miss out on inspiration with these great products!
Hi everyone! I'm here with you today to share a super fun Christmas card using several new dies from Little Darlings. As an added bonus, all dies and embossing folders are on sale 20% off until October 31. Just use the code STAMPTOBER20 at checkout to get the discount!
To create this card, I used some beautiful design paper from the Winnie Winter Land 6x6 Paper Pack. I then used some white cardstock to place behind the design paper and cut it out using the gorgeous Holly Border Die (I also cut the top of the design paper with the second die in the Holly Border Die set so they would match when paired on top of each other). I then cut out Christmas Word Die with some Gold Foil Paper and then three pieces of white paper underneath to give it a slight shadow and some dimension. I then cut out the Cheer Word Die out of some red cardstock and then three pieces of white cardstock underneath to give it some dimension as well. I then added some glitter to the word Cheer using my Wink of Stella Glitter Pen. I then adhered the bottom design paper and Holly Border die to some black cardstock and then adhered my two word dies on the top part of the black cardstock. Next, I used the gorgeous Grace Ornament Die Set to cut out the beautiful ornament (I used red cardstock and gold foil paper). I added some black twine to the hole the die makes in the ornament and tied a bow and then adhered the ornament to the black cardstock panel using foam tape. Finally, I adhered the entire black cardstock panel to a standard white A2 card base.
Here's a video tutorial showing how I put this card together:
Don't forget to check out the Clearance Section to find some amazing deals. Also, don't forget the amazing 20% off sale on dies and embossing folders from now until October 31 (use the code STAMPTOBER at checkout to get the discount).
I really hope you enjoyed my card for today. It is super possible to create really gorgeous, elegant holiday card by just using some of these new dies.
Thank you for joining us here at the LDRS Inspiration Blog. Remember we are always here to inspire you.
There are some great deals in the CLEARANCE SECTION of our store available NOW and there is a DISCOUNT CODE available on the Spotlight product from the monthly NEWSLETTER so get signed up! Love video tutorials? Our DT on the YOU TUBE channel will show you how to use the products. Visit us at any of our other Social Media locations and never miss out on inspiration with these great products!
Hi everyone! I'm here with you today to share a super cheery, bright, and fun card using the delightful and oh so adorable Polkadoodles I Brought the Cake image. As detailed as this image is, it is super simple to stamp (it truly stamps like butter, there's no need for a stamp positioning tool here, it stamps perfectly the first time) and it is super simple to color. Here, I water colored the image and it was so much fun to do! I used the amazing dies available from Little Darlings Rubber Stamps to create a beautiful layout on my card which really showcased the image and framed it nicely. And, as an added bonus, all dies and embossing folders are on sale 20% off until October 31. Just use the code STAMPTOBER20 at checkout to get the discount!
Here's a video tutorial on how I put this card together:
To create this card, I used the adorable I Brought the Cake Stamp Set from Polkadoodles and then I water colored the image with my Zig Markers and a water brush. I used the Soft Blush Paper Pad to create the backdrop to the image and also the inside die that the image is sitting on top of. I used the Regal Frames Die Set to cut out the gorgeous Brown frame, the patterned paper frame the image is sitting on top of, and the pale pink element in the top right corner. I also used the gorgeous Scalloped Swag Border Die to create elegant panels at the top and bottom of my card. For the sentiment, I used the super versatile Splendid Azure - Quick Words Stickers. I chose the "Life is Full of Blessings" sentiment because I love it and I thought it went well with the image.
Don't forget to check out the Clearance Section to find some amazing deals. Also, don't forget the amazing 20% off sale on dies and embossing folders from now until October 31 (use the code STAMPTOBER at checkout to get the discount).
I really hope you enjoyed my card for today. It is super possible to get really gorgeous coloring results by water coloring your image and I hope you'll give it a try. Also, try pairing your dies together to create a gorgeous layout on your card that really showcases your main image and your design.
Thank you for joining us here at the LDRS Inspiration Blog. Remember we are always here to inspire you.
There are some great deals in the CLEARANCE SECTION of our store available NOW and there is a DISCOUNT CODE available on the Spotlight product from the monthly NEWSLETTER so get signed up! Love video tutorials? Our DT on the YOU TUBE channel will show you how to use the products. Visit us at any of our other Social Media locations and never miss out on inspiration with these great products!
Hi everyone! I'm here with you today to share a super cheery, bright, and fun card using the delightful and oh so adorable Everything Stops for Walkies image. This image was perfect for combining my love of coloring and water coloring onto a card to create a scene. I loved water coloring the background and I also painted the beautiful image. Who wouldn't love to go walking with that cute little puppy? :)
I have a quick video showcasing some of the great products used on this card:
(To watch on YouTube, click HERE)
To create this card, I used the adorable Everything Stops for Walkies Stamp Set and then I water colored the image with my Zig Markers and a water brush. I also created the fun watercolor background with watercolor paints and I added some shimmer paint to the top for some extra shine. I used the Splended Azure 6x6 Paper Pad for my design papers. This paper is so gorgeous, I can't get enough of it. I love the beautiful, rich colors and the color scheme. I used the Splendid Azure Cut Outs to stamp my sentiment onto and then I embossed my sentiment with some black embossing powder so it would really stand out. Finally, I used the absolutely gorgeous Dotted Wings Die Set to create the beautiful butterflies in the top left corner.
I just love the richness of the design paper and it was so fun finding watercolors to match the papers. Here is a close-up of the gorgeous butterfly die:
I added some silver glitter paper to the butterflies I put on top to give some extra shimmer and sparkle.
Here's another look at the Splendid Azure Cut Outs with the sentiment stamped right on. I just love how these coordinate perfectly with the design paper.
I had a slightly difficult time capturing all the shimmer I put onto the background with some shimmer paint. This next photo is not the greatest, but I wanted the fun shimmer to show through.
;0
If you click on this picture to make it bigger, you can really see the shimmer and shine :)
I really hope you enjoyed my card for today. Don't forget, you don't have to be good at water coloring to create a fun, abstract background scene on your card. It's so fun to do and I think it comes out looking really sweet. While you're here, don't forget to check out the Clearance Section at the shop to find some amazing deals.
I really hope you enjoyed my card for today. Thank you for joining us here at the LDRS Inspiration Blog. Remember we are always here to inspire you. There are some great deals in the CLEARANCE SECTION of our store available NOW and there is a DISCOUNT CODE available on the Spotlight product from the monthly NEWSLETTER so get signed up! Love video tutorials, our DT on the YOU TUBE channel will show you how to use the products. Visit us at any of our other Social Media locations and never miss out on inspiration with these great products!
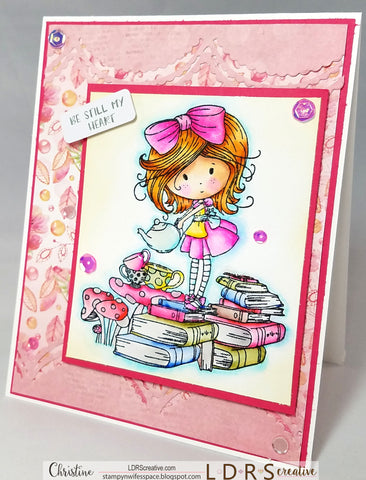
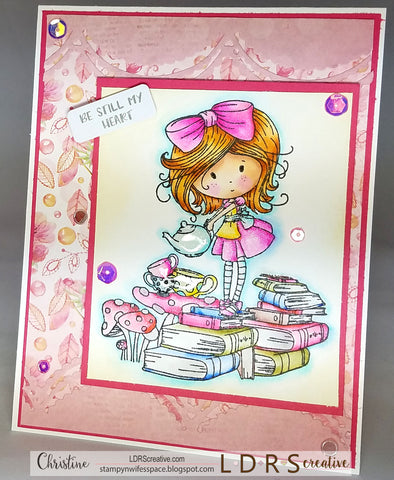
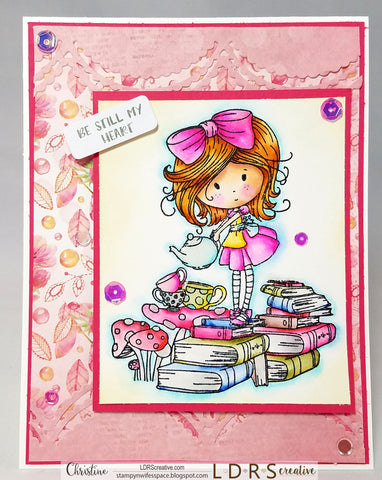
Hi everyone! I'm here with you today to share a super cheery, bright, and fun card using the delightful and oh so adorable Time for Tea image. As detailed as this image is, it is super simple to stamp (it truly stamps like butter, there's no need for a stamp positioning tool here, it stamps perfectly the first time) and it is super simple to color. Here, I water colored the image and it was so much fun to do! This sweet Time for Tea image combines two of my loves: Tea (obviously :) ) and reading. This image was absolutely perfect for me and I knew this had to be my first image I worked with as a new member of the LDRS Design Team :)
To create this card, I used the adorable Time for Tea Stamp Set and then I water colored the image with my Zig Markers and a water brush. I used the Soft Blush Paper Pad to create the backdrop to the image. I also used the gorgeous Scalloped Swag Border Die to create elegant panels at the top and bottom of my card. For the sentiment, I used the super versatile Splendid Azure - Quick Words Stickers. I chose the "Be Still My Heart" sentiment because I'm sending this card to a fellow book lover and we both have books on our hearts :)
In this photo, the lighting is a bit off, but I wanted to share because this was the best way I found that I was able to show in the photo all the glossy accents and glitter accents I added to the image. To do this, I first added my Wink of Stella Glitter Pen to various elements of the image such as the bow in her hair, her dress, the tea pot, and the cups. I then went over the cups and tea pot with Glossy Accents to create a fun shiny look. It's really fun and sparkly in real life.
I'm so honored to be a DT Member for LDRS Creative. This is a company I have admired and followed for forever and it's such an honor to work for them now. I hope you enjoyed my card today. I have also created a video tutorial showing how I created this card. You can view the video here:
Don't forget to check out the Clearance Section to find some amazing deals.
I really hope you enjoyed my card for today. It is super possible to get really gorgeous coloring results by water coloring your image and I hope you'll give it a try.
Thank you for joining us here at the LDRS Inspiration Blog. Remember we are always here to inspire you. There are some great deals in the CLEARANCE SECTION of our store available NOW and there is a DISCOUNT CODE available on the Spotlight product from the monthly NEWSLETTER so get signed up! Love video tutorials, our DT on the YOU TUBE channel will show you how to use the products. Visit us at any of our other Social Media locations and never miss out on inspiration with these great products!
Unless otherwise stated all content is by Christine Riley. Please do not copy my work for submission for publication or contests. However, please feel free to copy/lift my cards or layouts for your own personal use. Thanks so much.