Hi everyone! It's Christine here to share a fun wintery card with you today using a brand new stamp set from My Favorite Things. Here's my card:
For my card today, I first cut out a piece of Kraft cardstock and inked it with some Faded Jeans Distress Oxide Ink. I then used my Echo Park Snowflakes #2 stencil and some Silver Glitter Paste to create the beautiful textured and glittery snowflake background. Next, I stamped my adorable image from the Ski-sons Greetings stamp set by MFT onto Canson XL watercolor paper and then painted the image with my Zig Clean Color Real Brush Markers and a Detailer Water Brush. I then cut the cute bear out using the Coordinating DieNamics Ski-sons Greetings dies and then adhered the image to the front of the snowflake panel with foam tape. I next stamped the sentiment onto some black cardstock with some Versamark Ink and then heat embossed it with white embossing powder. I then adhered the sentiment to the panel using foam tape and then adhered the entire panel to a standard A2 sized card base. What do you think?
Well, that's it from me today. Thanks so much as always for stopping by
To create this card, I first stamped the image onto Canson XL watercolor paper. Next, you could definitely cut out a mask and use that on top of your image, but I did not do that. I found that the Cloud Stencil from My Favorite Things was so easy to work with, I could see through it so I simply placed it over my image and did my inking around the stamped image. I used Wild Honey Distress Oxide Ink and Candied Apple Distress Oxide Ink for my inking. I then removed the cloud stencil and did some light water spraying with my distress sprayer. Next I colored the image with my Zig Markers and my Detailer Water Brush. I cut the panel down slightly and then stamped the sentiment. I then adhered the panel to a standard sized A2 card. What do you think?
Well, that's it from me today. Thank you so much as always for stopping by and have a wonderful day! Hugs!
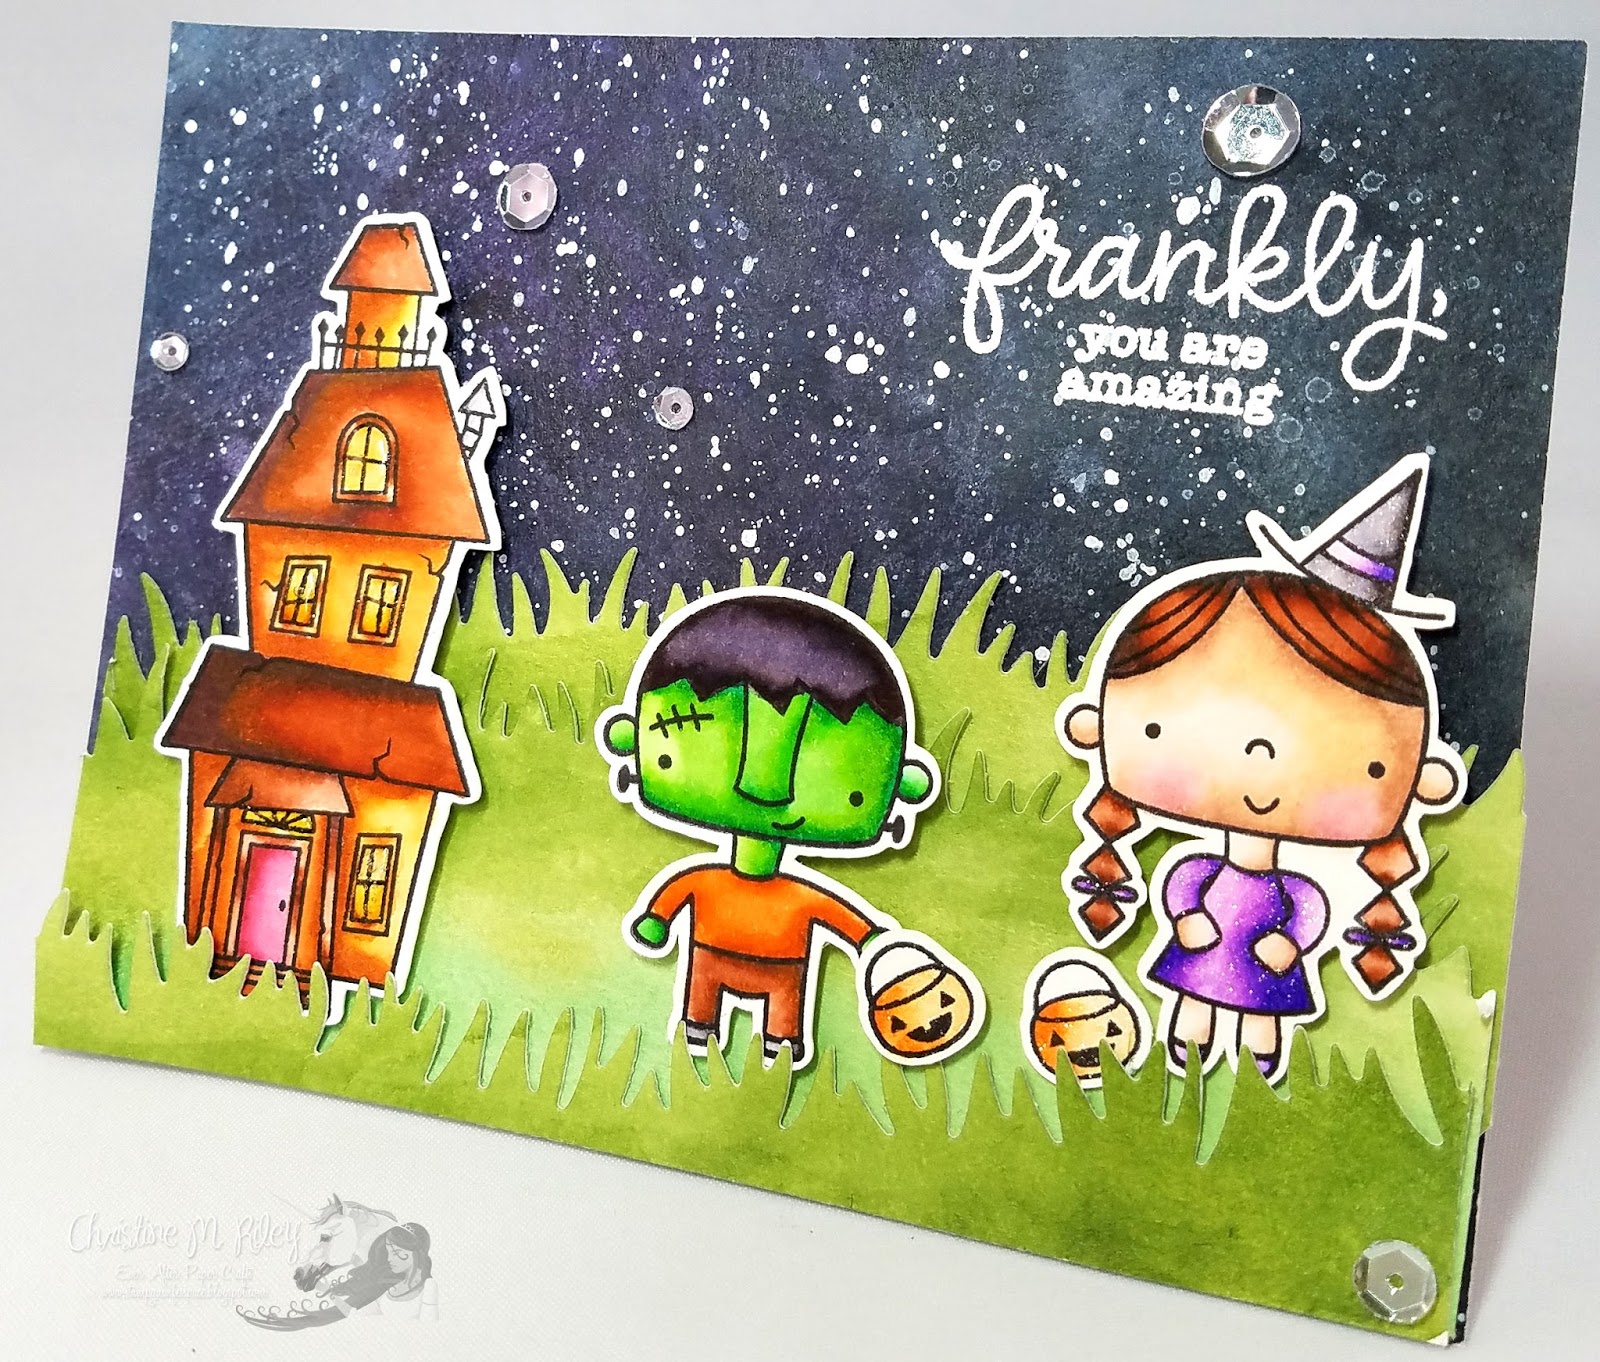
Hi everyone! I have a new card and video up today combining some stamps from My Favorite Things and Simon Says stamp. I water colored a galaxy/starry night sky background and the grass with my Gansai Tambi watercolor paints. I also painted the images with my Zig Markers and a water brush. You can view the video here:
And here are some pictures of my card:
For the Witch, I used the following Zig markers:
Hat: Black, Violet
Hair: Brown, Dark Brown
Dress: Violet, Light Violet
Shoes: Violet
For the pumpkin trick or treat baskets, I just used Orange
For Frankenstien, I used the following Zig markers:
Skin tone: Green, Light Green
Hair: Black
Shirt: Brown, Orange
Shoes: Black
Pants: Brown, Dark Brown
For the spooky house, I used the following Zig Markers:
Roofs: Dark Brown, Brown
Base of House: Brown, Light Brown
Inside Windows: Orange, Yellow
Door: Deep red
Exhaust Pipe: Gray, Light Gray
I used my Lawn Fawn Simple Grassy Hillside dies to cut out the grass. I adhered everything to the card base with foam tape and also white heat embossed the sentiment. What do you think?
Well, that's it from me today. Thanks so much as always for stopping by. Huge hugs!
Hi everyone! :) I hope you are having a fantastic week! For all my readers affected by Harvey and to those in the path of Irma, I want you all to know you are in my thoughts and my prayers and if there's anything you need or anything I can do from here, please don't hesitate to ask.
I have a fun Halloween card and video to share with you all today. In this video, I share how I water colored this adorable witch image from My Favorite Things. Here's my video:
(To watch on YouTube, click HERE)
In this video, I share how I painted the adorable witch and I also share how I put the card together. To see how I created the exact watercolor background you see on the card, please watch this video here:
To create my card for today, I first created the background using the purple and gold paints from my Gansai Tambi watercolor paints. I then let the background dry and cut it out with a large stitched rectangle die from Lawn Fawn (it's the largest die in the Large Stitched Rectangle Die set that covers the entirety of an A4 sized card (4 1/4 by 5 1/2)). I used the Silver and Black watercolor paints from the same paint set to color the moon (which I cut out using a circle die I had in my stash).
Next, I stamped the adorable images from the adorable Witch Way is the Candy Stamp set by MFT using my Hero Arts Black Dye Ink (which is my favorite for water coloring). I then painted the images with my Zig markers and a water brush. To color the witch, I used the following colors: Black (for hat and cloak), Dark Brown and Brown (for hair), Violet and Light Violet (for dress and boots), Brown and Light Brown (for top of broom), Dark Brown (for broom stick), Light Green and Orange (for shirt and stockings), Yellow, Light Violet, and Violet (for band around hat), and Flesh Color, Blush, and Almond Pink for her skin tones. For the pumpkins, I used orange and then Dark Brown for the stems. For the cat, I used Black, Light Violet and Violet for the bow tie, and Light Green for his eyes.
Next, I cut the grass out of black cardstock using my Grassy Hillside Borders dies from Lawn Fawn. I adhered the grass to the bottom of the panel. I then used some white embossing powder to emboss the sentiment. Finally, I adhered all the images with foam tape onto the panel and then adhered the entire panel to the front of a white A2 notecard using foam tape. I added some Wink of Stella glitter pen to her dress and to the pumpkins and I also added some sequins (which I adhered using Ranger's Multi Media Matte glue). What do you think?
Well, that's it from me today. I hope you enjoyed today's card. Have a wonderful day!!!
Hi everyone! I hope you are all having a wonderful week. I have a new card and video tutorial to share today showing how I painted these adorable images from My Favorite Things with my Zig Markers and a water brush. Here's the video:
To see how I created this exact starry night/galaxy background with my Gansai Tambi watercolor paints, please see this video here:
And here are some pictures of today's card:
For today's card, I used the following Zig markers: Gray, Light Gray, Yellow, Brown, Light Brown, Blue, Deep Red, Flesh Color, Blush, and Almond Pink. I embossed the sentiment with white embossing powder. All the images were adhered using foam tape. What do you think?
That's it from me today. Thanks so much as always for stopping by and I'll catch you in the next video!
Hi everyone! In today's video, I show how I colored the mermaid seen in yesterday's card/video tutorial for the underwater background. Here's the video:
I used the following Zig markers: Brown and Dark Brown for her hair, Yellow and Brown for the Star Fish, Turquoise Green and Purple for her tail, Turquoise Green for her top, and Flesh Color and Blush for her skin (and Almond Pink for her cheeks). And here's the full card, as posted yesterday:
Thanks so much for watching and I'll catch you in the next video! :)
Hi everyone! I'm a bit behind this week in my videos/blog postings. I've gotten another sinus infection, ugh, so that's put me a bit behind. I'm excited to share today's video and card with you though, I'm really happy with how this one came out. In my video today, I teach you how to create a gorgeous underwater scene using distress inks. I used the adorable Mermazing stamp set from My Favorite Things (I love this set!) Here's my video on how to create the background:
And here are some photographs:
I created the background using Antique Linen, Vintage Photo, and Walnut Stain Distress Inks and some water for the sand. I created the waves by using Salty Ocean, Seedless Preserves, and Peacock Feathers Distress inks and some water. I then used some white acrylic paint to splatter some white splotches over the panel. I then cut out "waves" using the MFT Ocean Waves dies out of the distressed wave panel. I then inked the tops of each wave with Staz On white ink to add some definition. I colored all the images with my Zig Clean Color Real Brush markers. I used Brown and Dark Brown for the mermaid's hair, Purple and Turquoise Green for her tail, Turquoise Green for her top, Yellow and Brown for the starfish, and Flesh Color and Blush for her skin. I coated all the images with my Wink of Stella Clear glitter pen. I also added some sequins from my stash. What do you think?
Well, that's it from me today. Thanks so much as always for stopping by. Have a wonderful day and I'll catch you in the next video!
Unless otherwise stated all content is by Christine Riley. Please do not copy my work for submission for publication or contests. However, please feel free to copy/lift my cards or layouts for your own personal use. Thanks so much.




 Posts
Posts


