Hi everyone! I hope you are all having a wonderful day and for my friends in the US, I hope you are having a great start to your Memorial Day weekend! I have a fun video and card to share with you today using an adorable stamp set from Simon Says Stamp and some other products to create a fun scene on my card. Here's my video tutorial:
And here are some pictures:
I used my Lawn Fawn Simple Grassy Hillside dies to create the grass. I then used the new Cloud Stencil from My Favorite Things to create the cloud background (I used Broken China Distress Oxide ink). I then stamped all the images from the adorable Some Bunny Special stamp set from Simon Says Stamp with Black Dye ink from Hero Arts. I then colored all of the images using my Zig Clean Color Real Brush markers and a water brush. I used Gray Brown and Peach Pink for the bunny, and brown for the pot he's standing on and Light Green for the grass. I used Gray, Wine Red, and Dark Oatmeal for the mailbox. I used pink, yellow, and light green for the pink flowers and light blue, yellow, and light green for the blue flower. I used orange and light green for the carrots. I also heat embossed my sentiment (also from the same stamp set) with white embossing powder from Simon Says Stamp. Finally, I added some sequins from Pretty Pink Posh (the friendship mix). What do you think? Well, that's it from me today. Thank you all so much as always for stopping by! Big hugs!
Hi everyone! I hope you are all having a fabulous week. I have a new video tutorial and card to share today using this gorgeous stamp set from Simon Says Stamp called More Spring Flowers. I love this stamp set, it was so much fun to color these flowers in. In my video tutorial for today, I show you some tips on how I use my Zig Clean Color Real Brush markers to create multiple colors when coloring flowers. I also show you how you can use one marker color to get gorgeous shaded results using that marker and a water brush. Finally, I also show you how I created the distress inked background. Here's the video tutorial:
And here's some pictures:
I inked all the flowers in Versamark ink and then heat embossed them in white embossing powder. For the background, I used Picked Raspberry and Mowed Lawn distress inks to create the blended background, then I spritzed the background with some water for a distressed look. To color my flowers, I used the following Zig marker colors: Pink, Light Pink, Blue Gray, Yellow, Orange, Olive Green, Light Green. The sentiment is from the Hero Arts You are Loved stamp set. Twenty-five percent of all proceeds from this stamp set go to the Jennifer McGuire Ink Kindness Campaign, which is such a worthwhile cause. I stamped the sentiment in Versamark ink and heat embossed it with white embossing powder. I added all of the elements with foam tape. I then added some Nuvo Crystal Drops in Morning Dew and Carnation Pink. I coated all the flowers with Wink of Stella clear glitter. What do you think?
Well, that's it from me today. Thank you so much as always for stopping by. Have a wonderful day!
Hi everyone and Happy Tuesday! I hope you are all having a wonderful week. With the horrible news coming out of Manchester, I just wanted to color some cute flamingos today and send some cards out to spread a little kindness. My heart is with all the people of England and around the world. Let's let love win, not hate.
Okay, onto my fun cards for today. I just had to play with this adorable new set from Clearly Besotted called Fluffy Flamingos. How cute are these guys?!?! :) I am still playing with my new Zig markers and playing around with some techniques. In today's video tutorial, I show how I was able to use a light pink and an orange marker to create a multi-colored flamingo. I also show some distress inking and I also have five card samples to share. Here's the video:
And here are some close up pictures of my cards:
For these cards, I stamped all the flamingoes with Hero Arts Black Dye ink. I then colored them with my zigs. For the flamingo I colored in the video, I used Peach Pink and Orange. For the other flamingos, I used various combinations of Peach Pink, Pink, Dark Pink, and Light Pink. I blended everything with a water brush. For the green distress background, I used Cracked Pistachio Distress Oxide ink. For the pink backgrounds, I used Worn Lipstick Distress Oxide ink. For the blue background, I used Broken China Distress Oxide ink. For the multi colors, I used Salty Ocean, Spiced Marmalade, and Picked Raspberry Distress Inks. For the two cards with clouds, I used the cloud border dies from Lawn Fawn. The design paper is from Stampin' Up and I also used various sequins from my stash. I hope you liked my video and my cards today. Thanks so much as always for stopping by. Hugs!
Hi everyone! I used random.org to select the winner of the God Mud? stamp set from Your Next Stamp. The winner is Kleri F. Please email me at christinemriley@gmail.com with your address and I'll make sure your new stamp set gets to you! Thanks so much everyone for leaving comments and playing along! :)
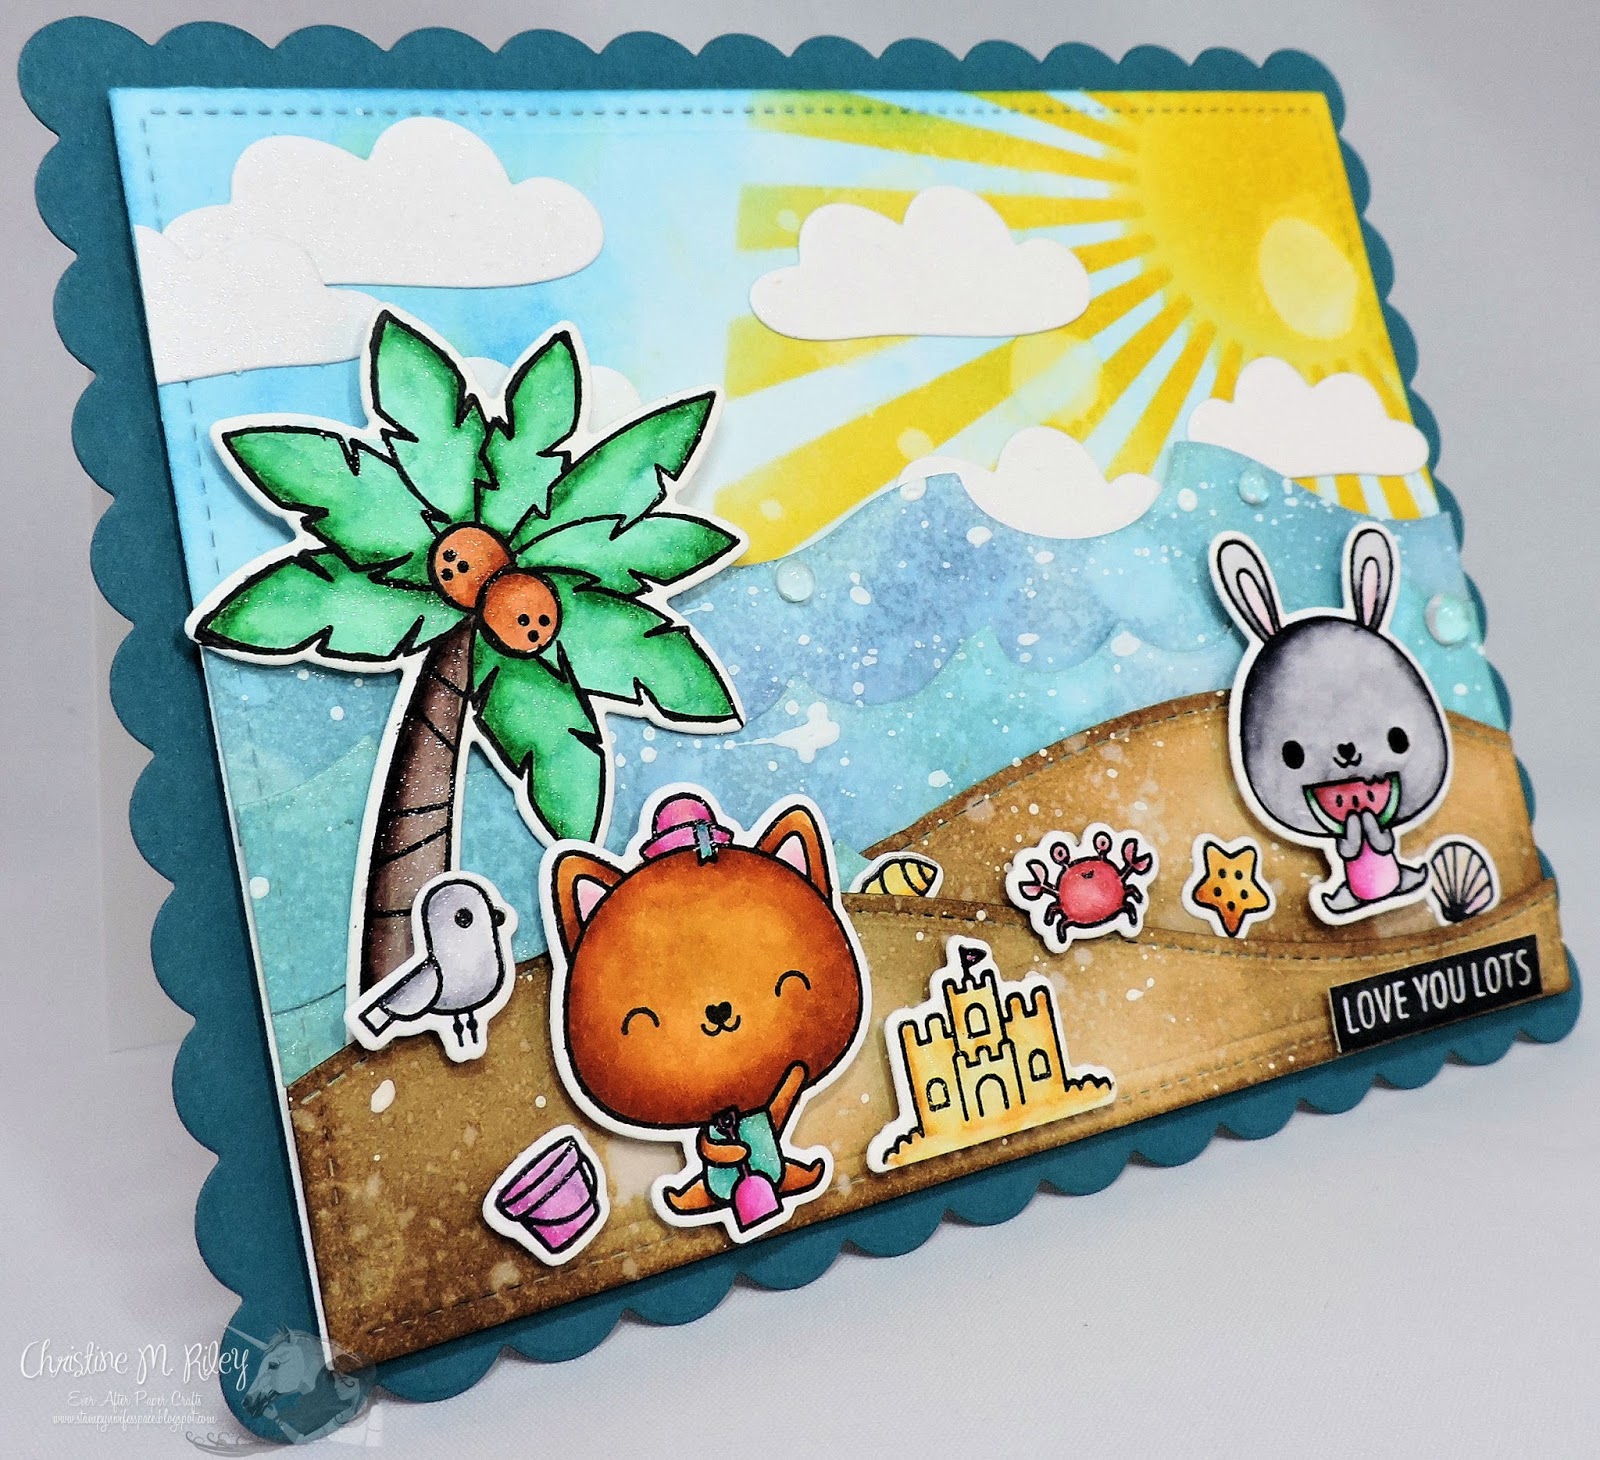
Hi everyone and Happy Monday! I hope your week is off to a wonderful start! I'm super excited to share my card with you today. I just recently got some stamps from the brand new Mama Elephant stamp release and I just had to play with this new set called Summer Days. This set was SO much fun to play with. I couldn't stop coloring the little critters (and as you'll see in my video, I have a ton that I already colored for future cards :) ). Here's a link to my video tutorial:
And here are some pictures of my card.
I colored all the images with my Zig Clean Color Real Brush markers (any time I use Zigs or do any ink blending, I use Bristol Smooth cardstock, so all white cardstock in this card is Bristol Smooth). I used Antique Linen, Vintage Photo, and Walnut Stain distress inks for the sand dunes. I used Broken China and Faded Jeans Distress Oxide inks for the ocean. I used Salty Ocean distress ink for the sky and Mustard Scene for the sun (which I made using my Radiating Rays stencil from My Favorite Things). I used stitched hillside border dies from Lawn Fawn for the sand dunes and Ocean Waves die-namics dies from My Favorite Things for the waves. I used the Cloud 9 die-namics dies from My Favorite Things for the clouds. I coated just about everything with my Wink of Stella Glitter Pen so it all has a really pretty shine. The sentiment is from another Mama Elephant stamp set called Organic Blooms.
I hope you enjoyed my video tutorial and my card for today. I had so much fun putting this scene together. Thanks so much as always for stopping by and I'll see you tomorrow with another card and video! :)
Hi everyone! I have a super simple but fun card to share with you today using Stampin' Up!'s Sweet Cupcake stamp set. This set uses layer stamping to create a dimensional cupcake with dimensional icing and cake. I used all Stampin' Up! products to create this card. Here's my video tutorial on how I made this card:
Part One:
Part Two:
And here are a couple pictures of the card:
To create this card, I stamped the icing with Blushing Bride, Flirty Flamingo, and Melon Mambo ink from Stampin' Up! The cake was stamped with Crumb Cake, Soft Suede and Early Espresso. I used a confetti stamp from the stamp set and inked it with Chocolate Chip ink and stamped it onto Crumb Cake cardstock to create my background. I cut a square out with the stitched shapes dies and then put my card together, using dimensionals for some added pop. I used white embossing powder to emboss the sentiment. Finally, I added some enamel dots and rhinestones. If you are interested in any of the products I used today, please visit my Stampin' Up! store here. What do you think?
Well, that's it from me today. Thanks so much as always for stopping by. Huge hugs!
Hi everyone! I have a super fun set of notecards to share with you today using these super adorable images from Simon Says Stamp. This stamp set is called Funny Food Stamp Set and it's so adorable. I created a video tutorial for you. I'm so sorry, I'm trying to figure out why YouTube is splitting my vidoes into two parts, but for now, I'm just going to go with it :) Here's Part One:
And Part Two:
Now for some pictures :)
Now for some close ups:
This is the card I created on camera for you guys. It uses Cracked Pistachio and Worn Lipstick Distress Oxide inks and the image was colored with Zig Markers.
This one uses Vintage Photo, Walnut Stain, and Worn Lipstick distress inks and the images were colored with Zig Markers. I added Wink of Stella and Glossy Accents.
This one uses Vintage Photo and Wilted Violet Distress Oxide Inks. The image was colored with Zig Markers. I added some jelly and coated it with Wink of Stella and Glossy Accents.
For this card, I used Fossilized Amber and Worn Lipstick distress inks. The adorable pizza was colored with Zig markers.
For the cute fry guy, I used Worn Lipstick and Fossilized Amber distress oxide inks and colored him with Zig Markers. Other supplies used are Neenah Dessert Storm cardstock, Early Espresso cardstock from Stampin' Up!, design paper from Stampin' Up, Versamark ink, Chocolate Chip ink from Stampin' Up, and clear embossing powder. All images were stamped on Bristol Smooth cardstock and then were cut out using the coordinating dies from Simon Says Stamp.
Whew, well that's it from me today. I hope you enjoyed these notecards. Thanks so much as always for stopping by.
Unless otherwise stated all content is by Christine Riley. Please do not copy my work for submission for publication or contests. However, please feel free to copy/lift my cards or layouts for your own personal use. Thanks so much.






 Posts
Posts


