Saturday, October 14, 2017

Video Tutorial - Mama Elephant - Using Embossing Paste to Create a Fun Background on your Card

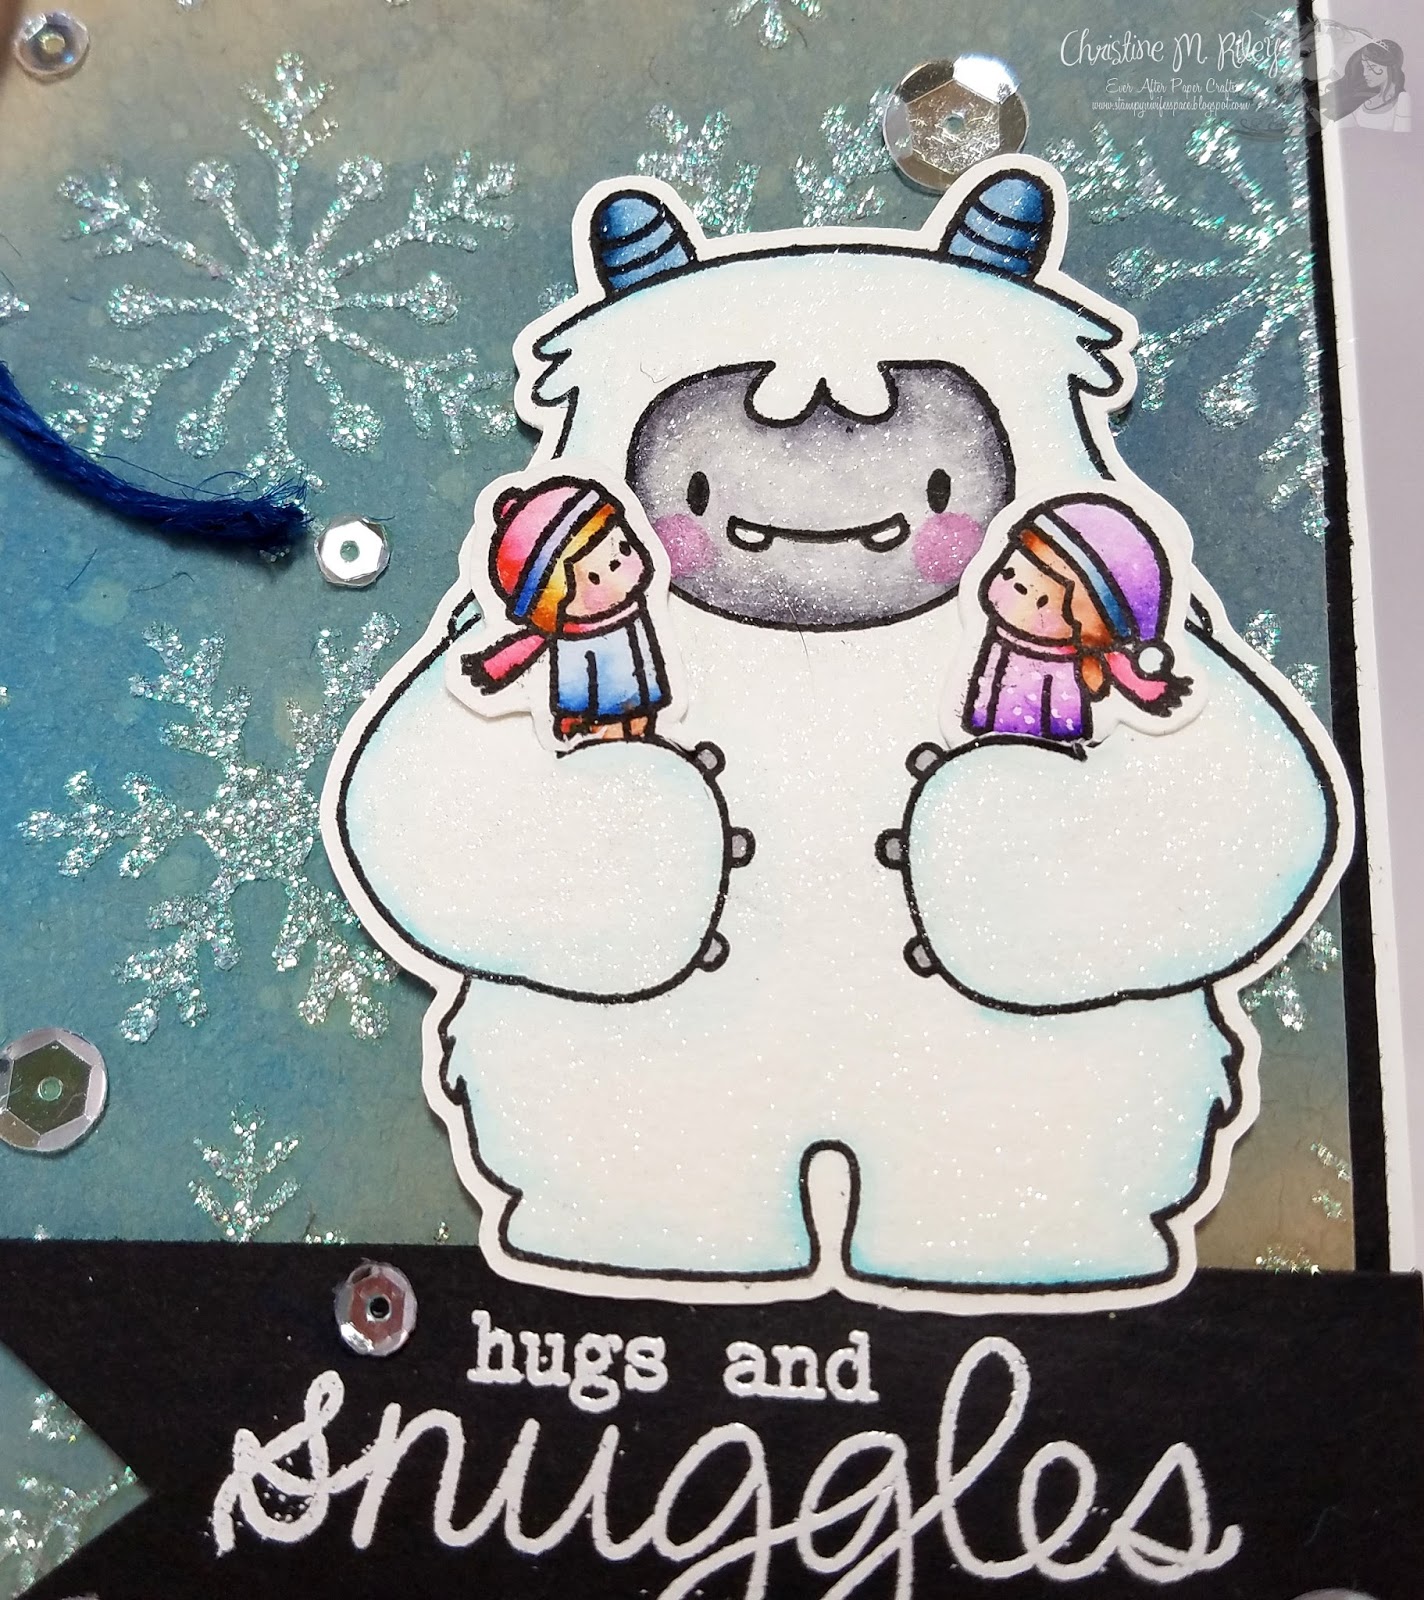
Hi everyone!  I hope you are all having a fabulous weekend.  I have a new card and video tutorial to share with you today featuring the adorable Me and My Yet Stamp Set from Mama Elephant.  This stamp set is SO fun to work with, I literally can't put it down :)  Here's my video:
(To view on YouTube, click HERE)

And here are some pictures of my card:


To create my card, I first cut a piece of Neenah Desert Sand Kraft Cardstock to 4" x 5 1/4".  I then applied some Salty Ocean Distress Oxide Ink and some Faded Jeans Distress Oxide Ink to the Kraft cardstock and then added some water with my Distress sprayer for a little distress effect.  I then used a snowflake stencil from EK Success, placed it on top of my Kraft cardstock, and added some Cosmic Shimmer Aurora Sparkle Texture Paste over the stencil to create the glitter snowflakes (you could use any embossing paste that you have for this technique).  Next, I painted the Yeti with  my Zig Clean Color Real Brush Markers and a water brush (I used Light Blue, Gray, Light Gray, Peacock Blue, and Sugared Almond Pink for the Yeti) and then coated him with my Wink of Stella Clear Glitter Brush.  I so painted the little boy and the little girl (skin tones for both here Flesh Color, Blush, and Sugared Almond Pink; Girl's hat and jacket were Violet and Light Violet, scarf was Red, Hair was Dark Brown and Brown; Boy's hat and scarf were Red and Cornflower Blue, jacket was Cornflower Blue, Hair was Brown and Light Brown).  I then cut the images out and cut slits in the arms with an Exacto knife so the kids could rest in the Yeti's arms.  I then stamped my sentiment from the Sentiments from a Yet Stamp Set from Mama Elephant with Versamark ink onto black carestock and embossed it with white embossing powder.  I tapered the end to give it a "V" shape and then adhered it and the Yeti onto the snowflake panel.  I then adhered that to some black cardstock and then adhered the entire panel to a white A2 sized card base.  I also added some dark blue twine to the top.  What do you think?

Well, that's it from me today.  Thanks so much as always for stopping by.  Hugs!


Friday, October 13, 2017

Video Tutorial - Kennedy Grace Creations - Water Coloring a Beautiful Floral Image with Zig Markers

Hi everyone!  I have a ew card and video tutorial to share with you today showing how I mixed my Zig Clean Color Real Brush Markers to paint this beautiful floral image from Kennedy Grace Creations.  Here's my video:

To view on YouTube, click HERE

And here are some pictures of my card:


To create this card, I stamped the beautiful floral image from the Friendship Blessings Stamp Set from Kennedy Grace onto some Canson XL watercolor paper.  I then colored it with my Zig Markers (for the petals, I used Brown, Orange, and Yellow, for the greenery, I used Olive Green, and for the shadow around the image, I used Light Blue, and for the dirt at the bottom, I used Brown).   I then added some Lemon Sorbet Sequins from Kennedy Grace around the image panel.  I then adhered the panel to some design paper and then adhered the entire panel to a Golden Yellow card base.  I then added the sentiment, from the same stamp set, onto t hat same cardstock.  What do you think?

Well, that's it from me today.  I hope you enjoyed today's card and video.  Big hugs!

Tuesday, October 10, 2017

Video Tutorial - Honey Bee Stamps Blah Bunny Plus Big Giveaway!!!!

Hi everyone!  It's Christine here for Butterfly Reflections, Ink and I'm here today to share a new card with you guys  using an adorable stamp set from Honey Bee Stamps.  I also have a video tutorial sharing how I created this card.  You can view the video here (MAKE SURE TO WATCH THE VIDEO, I'M GIVING AWAY SOME AWESOME STUFF!!!):
(To watch on YouTube, click HERE)

And here are some pictures of my card:


To create this card, I first stamped the images from the Blah Bunny Stamp Set from Honey Bee Stamps and then I painted the images with my Zig Markers and my Detailer Water Brush.  I then created my background by sponging some Wilted Violet Distress Oxide Ink onto my cardstock panel and then spritzed some water for a fun distressed effect.  I the stamped my sentiment from the Blah Blah Blah Stamp set from Honey Bee Stamps onto the panel.  I then adhered some Lets' Polka in the Dark DP from Lawn Fawn onto a standard A2 sized card base.  I then adhered my design panel with some Foam Tape.  I then adhered my images with Foam Tape and then added some glitter with my Wink of Stella Clear Glitter Pen and some Glossy Accents for some finishing touches.  Finally, I added some Violet Galaxy Nuvo Drops and some purple twine to finish it off.  What do you think?

Well, that's it from me today.  Thanks so much as always for stopping by.  Hugs!

Sunday, October 8, 2017

Video Tutorial - Mama Elephant - Creating an adorable winter scene with Me and My Yeti stamp set

Hi everyone!  I hope you are all having a wonderful weekend!  I have a fun card and video tutorial to share with you today showcasing the adorable Me and My Yeti stamp set by Mama Elephant as well as the adorable Sentiments from a Yet stamp set, also from Mama Elephant.  I also have a video tutorial showing how I put this card together.  Here's the video:
(To view on YouTube, click HERE).

And here are lots of pictures of my card so you can really see all the sparkle and shine:


To create this card, I first created the background panel using Broken China Disteress Oxide Ink and Faded Jeans Distress Oxide Ink.  I blended the colors together, then spritzed some water over the panel to look like snow.  I also added some shimmer spray from Hero Arts.  Next, I cut out my mountains using the Stitched Mountain Borders Die from Lawn Fawn.  I used some gray cardstock and some white glitter cardstock for the mountains.  Next, I cut out the tree line using the Forest Border die from Lawn Fawn.  I inked the tress with Mowed Lawn distress ink and also spritzed them with water.  I then created two snowy hills using the Stitched Hillside Border Dies from Lawn Fawn.  I slightly inked the hills with Tumbled Glass Distress Ink.  That's how I created my scene, it was super easy to do.

Next, I painted all my images with Zig markers and a water brush.  Here are the colors I used:
Yeti: Light Blue, Pink, Light Pink, Gray, Light Gray
Star Banner: Brown and Yellow
Girl on Yeti
 -hat - Peacock Blue, Light Pink
 -shirt - light pink
 -hair - light brown, yellow
Houses: Dark Brown, Light Blue, Cornflower Blue, Wine Red, Yellow
Trees: Green, Light Green, Light Blue
Little Boy looking up: Concord Blue and Green (hat), Red (scarf), Concord Blue (Jacket), Brown (pants),Black (Shoes)
Little Girl Looking Up: Pale Rose, Peacock Blue (hat), Red (Scarf), Pale Rose (jacket), Cornflower Blue (pants), Black (Shoes), Dark Brown and Brown (hair)
All skin tone is Blush, Flesh Color, and Sugared Almond Pink

I stamped the sentiment on the inside of the card.  What do you think?

Well, that's it from me today, thanks so much as always for stopping by!!!!


Saturday, October 7, 2017

Video Tutorial - Neat and Tangled - Creating a fun Holiday Scene

Hi everyone and Happy World Card Making Day! :)  I'm here to share another card and video tutorial featuring this adorable Holiday Baking Stamp Set by Neat and Tangled.  Here is the video:

(To view on YouTube, click HERE).

And here are some pictures of my card:


I painted all the images with my Zig markers and a water brush.  I used the following Zig Markers:
Bear: Dark Brown, Brown, Light Pink, Red, Light Brown
Cake: Light Blue, Red, Green, Light Brown, Brown
Mouse: Light Gray, Gray, Sugared Almond Pink
Spoon: Dark Brown, Light Brown
Whisk: Gray, light Brown
Bunny: Brown, Light Brown, Light Pink
Bird: Deep Red, Yellow
Milk: Light Blue
Sugar Tin: Red
Rolling Pin: Dark Brown

I then cut all the images out using the coordinating Holiday Baking Dies.  I created the background panel by blending Dried Marigold Distress Ink and Candied Apple Distress Oxide Ink.  I spritzed some water onto the background using my Distress Sprayer and then flicked some gold paint from the Gansai Tambi Starry Colors Paint Set.  I then adhered all the critters to the panel, then adhered the panel to some gold foil paper from my stash.  I added the sentiment with some gold embossing powder.  I also added some Bright Gold Nuvo Drops to the panel.  Finally, I adhered the panel to a standard A2 card base with some foam tape.  I added some Glossy Accents and some glitter from my Wink of Stella Clear Glitter pen for some finishing touches.  What do you think?

I hope you enjoyed today's card.  Have a wonderful day!!!

Tuesday, October 3, 2017

Video Tutorial - Lawn Fawn - Booyah - Creating a fun Halloween Scene

Hi everyone!  It's Christine here for Butterfly Reflections Ink and I'm so excited to share this fun Halloween care with you today.  I have created a video tutorial for my card today and if you are interested, you can view it here:
(To view on YouTube, click HERE)

And here are some pictures of my card:


To create my card, I first cut out the tree scene using the awesome Leafy Tree Backdrop: Portrait Die from Lawn Fawn.  This die also comes in a Landscape Orientation as well.  I can't say enough good things about this die set.  It is so easy to create fun scenes and believe me, well worth the money :)  Anyway, I cut this out and then I created my starry night sky background using my Gansai Tambi Watercolor - 36 Color Set.  I next adhered my cute black picket fence (cut from the adorable Picket Fence Border Die from Lawn Fawn) to the watercolor night sky panel.  I then adhered the Leafy Tree Backdrop: Portrait Die on top of the scene.  Next, I stamped my adorable ghosts and accessories from the Booyah Stamp Set from Lawn Fawn and then colored them with my Zig markers and my Detailer water brush.  I used the Booyah Coordinating Dies to cut everything out and then coated the ghosts with my Wink of Stella Clear Glitter Brush.  I then cut out the cat die from the Scalloped Treat Box Haunted House Add-On Die Set from Lawn Fawn and adhered him with Foam Tape to the card.  I added some eyes from the Doodlebug Eye Cand Shape Sprinkles for a fun touch.  I adhered my ghosts and accessories to the card with Foam Tape as well.  I then adhered the entire panel to an A2 sized card base with Foam Tape.  What do you think?

Well, that's from me today.  Thanks so much as always for stopping by and have a wonderful day!!!
Hugs, Christine

Monday, October 2, 2017

Video Tutorial - LDRS - Watercoloring and Using Dies to Create a Fun Card Layout


Hi everyone!  I'm here with you today to share a super cheery, bright, and fun card using the delightful and oh so adorable Polkadoodles I Brought the Cake image. As detailed as this image is, it is super simple to stamp (it truly stamps like butter, there's no need for a stamp positioning tool here, it stamps perfectly the first time) and it is super simple to color. Here, I water colored the image and it was so much fun to do! I used the amazing dies available from Little Darlings Rubber Stamps to create a beautiful layout on my card which really showcased the image and framed it nicely.  And, as an added bonus, all dies and embossing folders are on sale 20% off until October 31.  Just use the code STAMPTOBER20 at checkout to get the discount!

Here's a video tutorial on how I put this card together:

To create this card, I used the adorable I Brought the Cake Stamp Set from Polkadoodles and then I water colored the image with my Zig Markers and a water brush. I used the Soft Blush Paper Pad to create the backdrop to the image and also the inside die that the image is sitting on top of.  I used the Regal Frames Die Set to cut out the gorgeous Brown frame, the patterned paper frame the image is sitting on top of, and the pale pink element in the top right corner.  I also used the gorgeous Scalloped Swag Border Die to create elegant panels at the top and bottom of my card. For the sentiment, I used the super versatile Splendid Azure - Quick Words Stickers. I chose the "Life is Full of Blessings" sentiment because I love it and I thought it went well with the image.


 Don't forget to check out the Clearance Section to find some amazing deals. Also, don't forget the amazing 20% off sale on dies and embossing folders from now until October 31 (use the code STAMPTOBER at checkout to get the discount).

I really hope you enjoyed my card for today. It is super possible to get really gorgeous coloring results by water coloring your image and I hope you'll give it a try.  Also, try pairing your dies together to create a gorgeous layout on your card that really showcases your main image and your design.

Thank you for joining us here at the LDRS Inspiration Blog. Remember we are always here to inspire you.

There are some great deals in the CLEARANCE SECTION of our store available NOW and there is a DISCOUNT CODE available on the Spotlight product from the monthly NEWSLETTER so get signed up! Love video tutorials?  Our DT on the YOU TUBE channel will show you how to use the products. Visit us at any of our other Social Media locations and never miss out on inspiration with these great products!
Huge Hugs,
Christine

...and they lived happily ever after.
blog design by vk design company